This is an old revision of the document!
Instructions for adding a Kyocera printer to user stations
Important: notebook must be connected to WiFi residents !!! (libairfree WiFi is not supported)
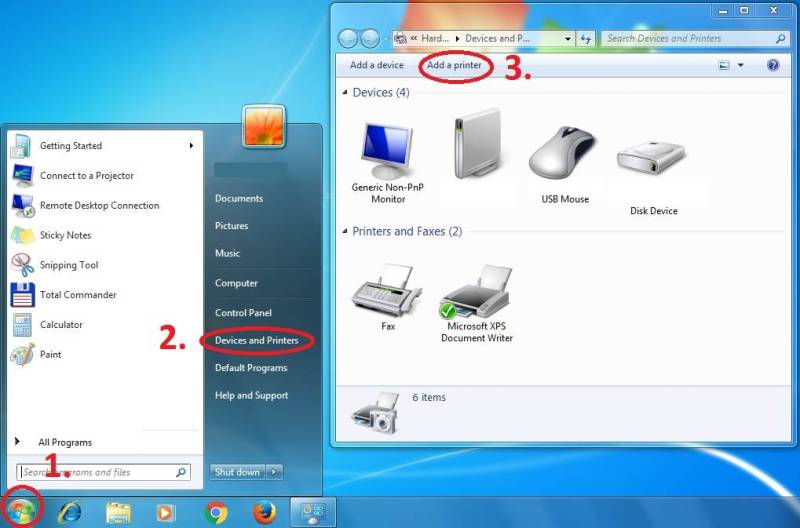
Press Start button→ Devices and Printers → Add a Printer
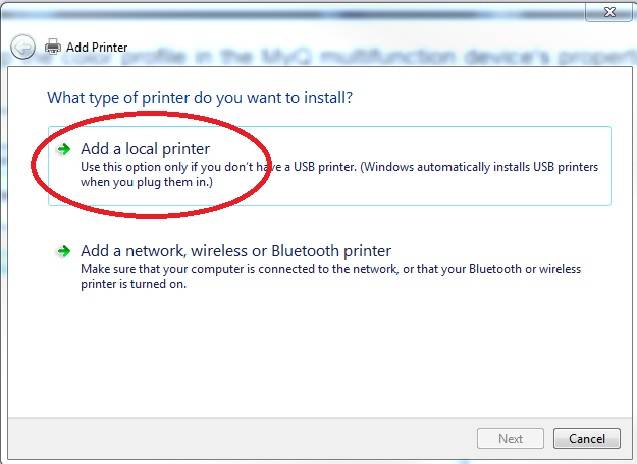
Add a local printer
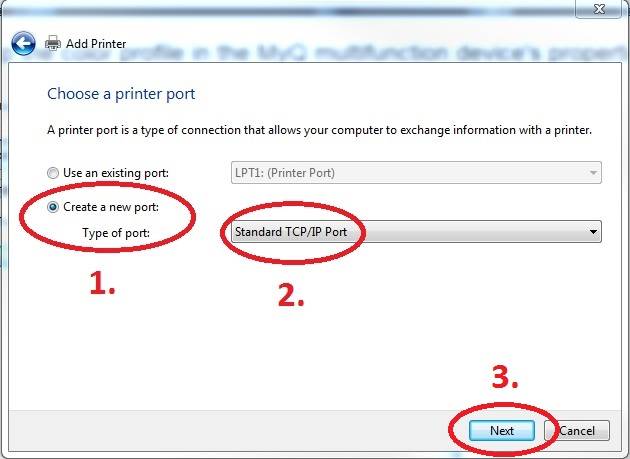
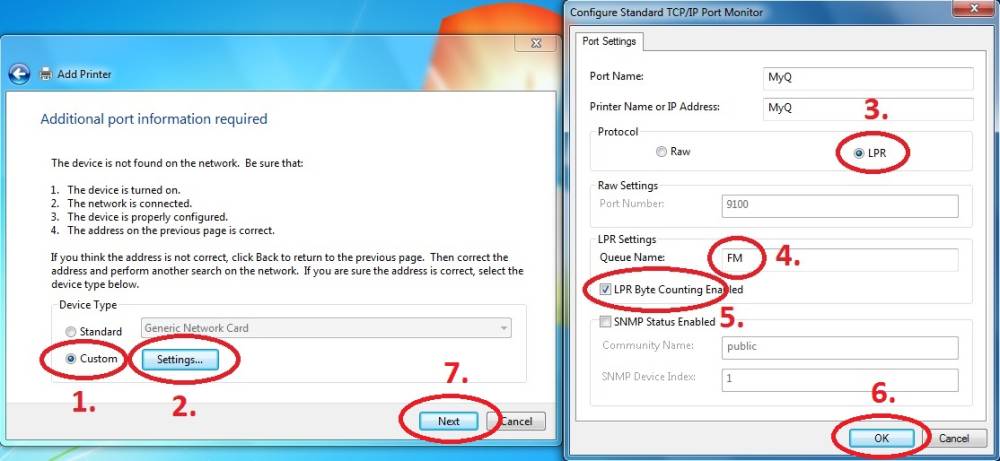
Create a new port: Standard TCP/IP Port
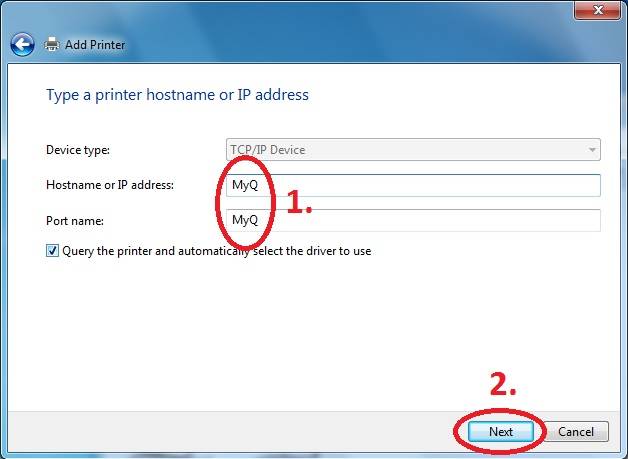
Enter Hostname - MyQ or myq.cerge-ei.cz
Customize Settings
Important settings (check twice 
- Protocol: LPR
- Queue name: FM
- [x] LPR Byte Counting Enabled
Download driver and unzip it to the local folder (for example c:\driver\). Choose 32-bit or 64-bit version depending on your system:
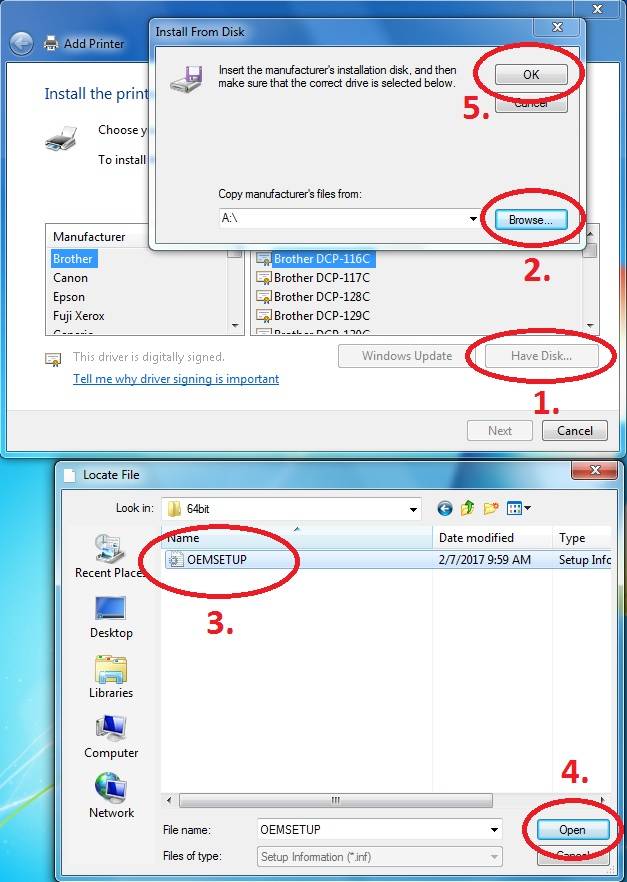
Press Have Disk… Navigate to the driver folder (for example c:\driver\64-bit\) and select “OEMSETUP”.
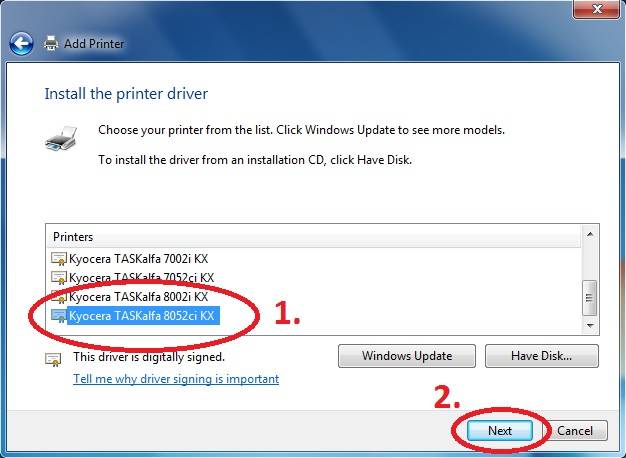
Choose Kyocera TASKalfa 8052ci KX
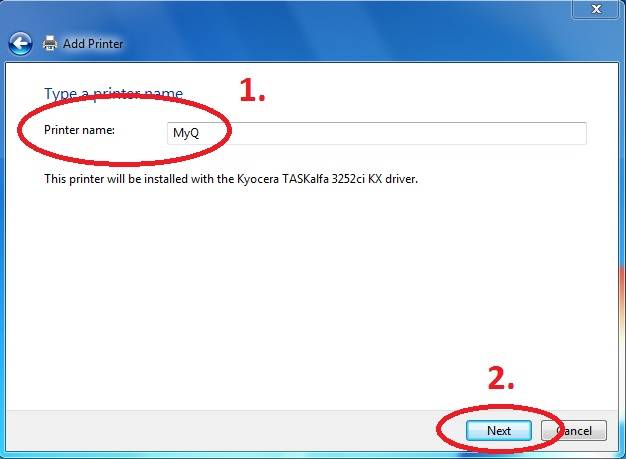
Rename Printer and finish installation.
After installing the printer, send your local username on the notebook to
helpdesk@cerge-ei.cz and we will allow printing for your account.
For Advanced settings go to: https://itinfo.cerge-ei.cz/doku.php?id=public:print:kyocera_profile